Discover how to make beef tallow at home with this step-by-step guide. Learn the benefits, uses, and tips for rendering perfect beef tallow every time.
Introduction
Today, I want to share with you how to render beef fat to make beef tallow. I’m going to go over a detailed explanation about what the difference is between tallow and suet and what the benefits of tallow are. Well, first of all, what is Tallow?
What is Tallow?
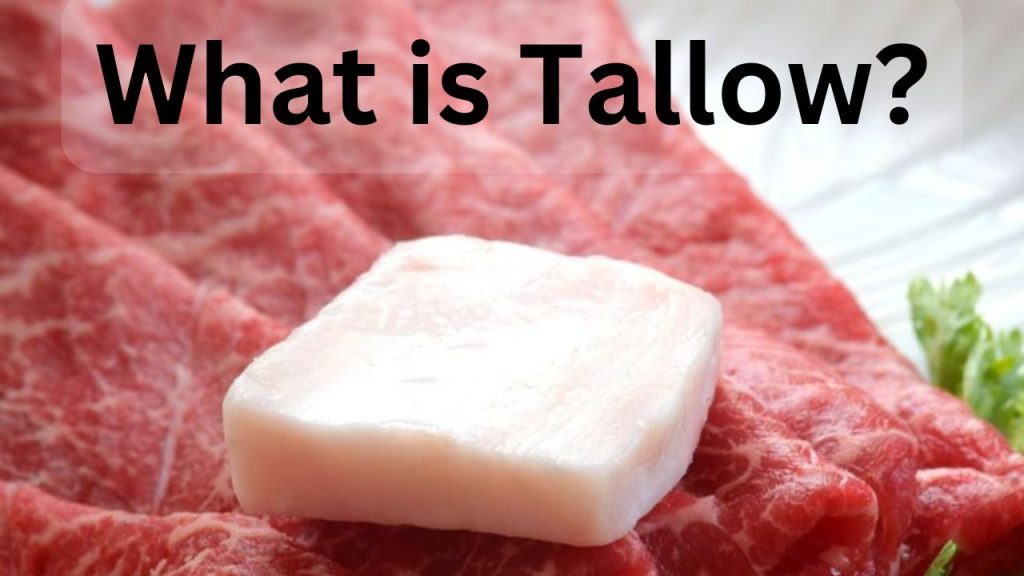
Tallow is rendered suet.
What is Suet?
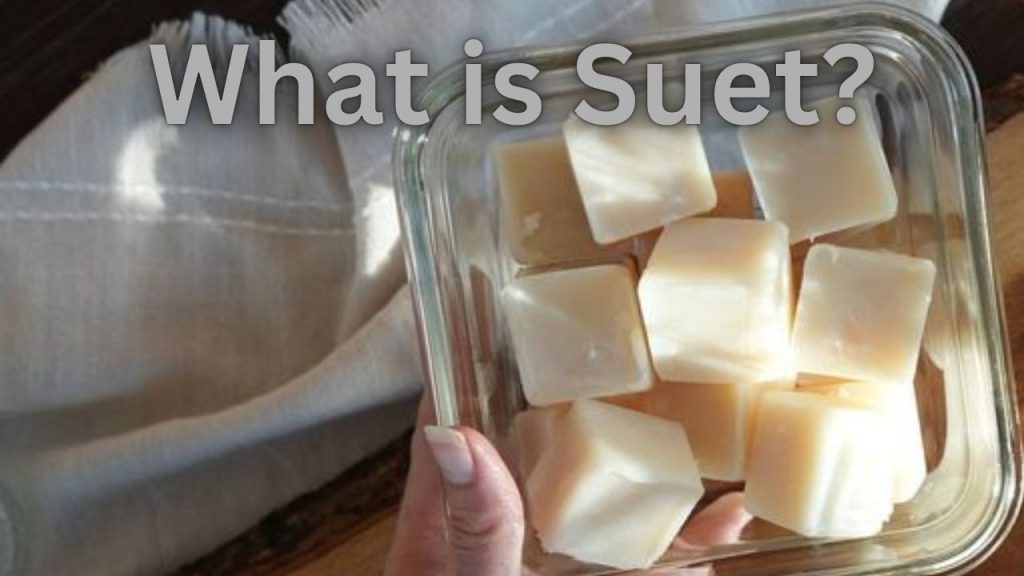
Suet is the fat that envelops a cow’s internal organs; the tastiest suet is the fat that envelops the cow’s kidneys.
Benefits of Suet and Tallow
Suet is very rich in Vitamin A, Vitamin D, Vitamin E, Vitamin K, and Vitamin B1, as well as a host of minerals, including selenium and choline. And when rendered into tallow, it introduces wonderful nutrition into our cooking and is something we want to have in our traditional foods kitchen.
Cooking with Tallow

The smoke point of tallow is 220 degrees Celsius, or 420 degrees Fahrenheit. Thus, it works great for deep frying, sautéing, and pan frying. Best of all, rendering suet and turning it into tallow is a relatively simple process.
What if You Can’t Find Suet?
Don’t worry. You can still make a form of beef fat that’s very rich in nutrients and perfect for cooking. You can ask your butcher to give you the trimmings that he’s removed from various roasts that they sell at the grocery store or your local farmer’s market. What that fat is, is fat from the muscle meat of the animal. Now, it’s still rich in nutrients, not as rich as suet, but it’s still rich in nutrients and it’s wonderful for cooking with. So if that’s all that you can find, definitely use that.
Shelf Life of Tallow
Now, both forms of fat, whether it’s fat that’s been removed from the muscle meat of the animal, or whether it’s specifically suet, are very shelf stable. Beef fat that’s been rendered from the fat that’s been removed from the muscle meat will be a little softer at room temperature. Whereas beef tallow, specifically tallow, that’s been rendered from suet will be very hard at room temperature. But both have a great shelf life and should last at room temperature, as long as they’re in a nice airtight container for about a year or longer.
Start to Make Beef Tallow
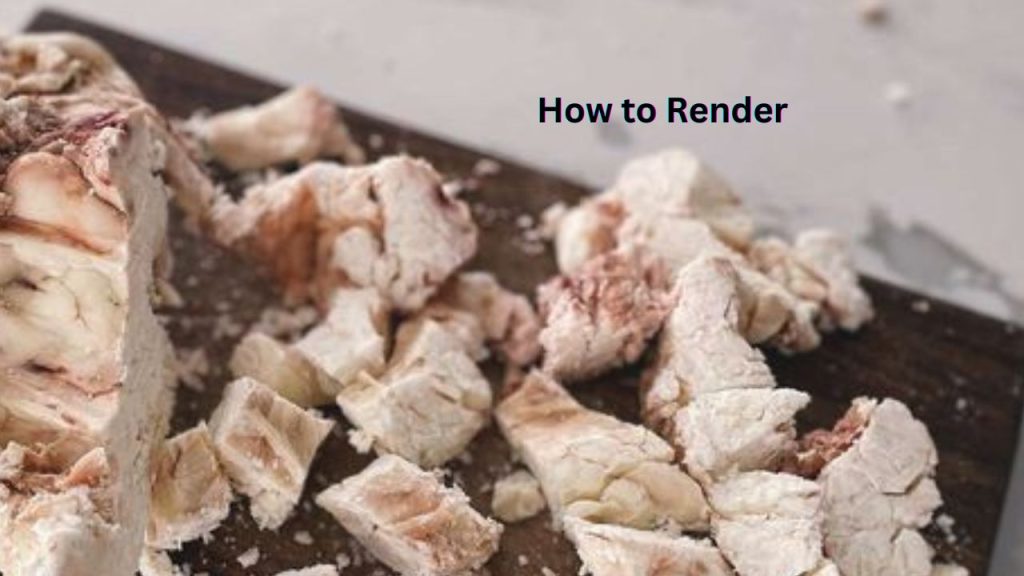
How to Render Beef Fat
Now, what I’ve got here is a five-pound package of suet. And this is suet that’s been removed from around the kidneys of a cow. Now, this has been run through a bit of a meat grinder. Now, you don’t need to worry about this if the suet that you’ve purchased is just a big chunk. The only difference is you’ll want to take that big chunk and you’re going to want to cut it up into about one-inch cubes. You don’t need to chop it real fine. You don’t need to run it through a food processor. None of that is necessary. Just cut it into, you know, fairly good-sized chunks.
Choosing the Right Pot

Now, depending on how much suet you have or how much fat trimmings you have from muscle meat will determine what size Dutch oven you want to use. Now, you can also use a saucepan as well. You just want to make sure that it’s a heavyweight one and that you have a lid for it. And you’ll want to make sure that whatever size saucepan or Dutch oven that you use, when you put the fat into it, it only comes up about halfway. And as you can see from this amount of suet that I have, I have a rather large enameled cast iron Dutch oven.
Preparing the Suet
Well, now this is the easy part. Since this was run through a meat grinder, all I have to do is go ahead and dump it into my Dutch oven. If you’re working with a large piece of suet, as I mentioned earlier, just cut it into about one-inch cubes and go ahead and put it into your Dutch oven. And the same is true, if you’re using fat trimmings from muscle meat, you’re just going to want to make sure that you cut those pieces into about one-inch cubes and do your best to remove as much of the meat from those trimmings as you can. So we go right into the Dutch oven, which makes it very easy.
The Rendering Process
Alrighty. Well, I’m going to go ahead and break this up. You’ll see that it’s very soft. All I’m going to do is just go around and loosen some of this up since it’s been held together, you know, in that bag. And then this way that’ll help facilitate the whole melting process or the rendering process. Now, the secret to doing this the right way is to do it low and slow. You have three options as you see, I’m putting it into a Dutch oven because I’m going to do this in the oven. You can also do this on the stovetop, the same way in a Dutch oven.
A third way is to do it in a slow cooker. If you use a slow cooker, you want to put it in its lowest setting. If you do this on the stovetop, you also want to keep it on a low setting and you will need to babysit it a little more than if you do it in the oven. But if you do it in the oven, you want to make sure that you keep your oven temperature at 225 degrees Fahrenheit. Furthermore, there’s no need to add any water to this.
In the past, folks would add water to keep the fat from burning, thus if you needed to add water, your oven temperature was probably too high. But that was only a result of the oven’s or the slow cooker’s temperature being set too high. This will render beautifully in the oven at around 225 degrees Fahrenheit, and it won’t burn.

Furthermore, there’s no need to add any water to this. In the past, folks would add water to keep the fat from burning, thus if you needed to add water, your oven temperature was probably too high. But that was only a result of the oven’s or the slow cooker’s temperature being set too high. This will render beautifully in the oven at around 225 degrees Fahrenheit, and it won’t burn.
Stovetop Rendering
Now on the stovetop, you may have this rendered after about two hours. You’re going to stir it regularly. You’re going to keep an eye on it and you may be able to get it done relatively quickly. In the oven or the slow cooker, it is going to take longer. And given the amount of suet that I am starting with, this is probably going to take at least five to six hours, whether I do this in the oven or the slow cooker.
Checking the Progress
So now I’m going to put the lid on, and then I’m going to pop this in the 225-degree Fahrenheit oven. And I’m going to check this after one hour, see how it’s doing, and stir it. Well, I rendered my suet for about five hours and I checked it for an hour and a half and it was coming along beautifully. I put the lid back on, pushed it back into the oven, and let it go a little longer. I checked it periodically about halfway through from that hour-and-a-half mark, and it still was doing well. And then at about five hours, I checked it and it really looked good and it also smelled wonderful. And you know, it’s interesting. How do you know when your suet is perfectly rendered? And that is something that to a certain extent will come to you over time from experience. What I do is I notice how the color looks and how is the fragrance, and then I’ll stir it around and I’ll see if the majority of the suet has rendered, in essence, has dissolved and turned into the liquid tallow.
Avoid Over rendering
Now, there may be a few pieces of suet that haven’t been completely rendered, but I don’t worry about that. I don’t try to be so exact and get every little bit of suet rendered. The reason is, that I don’t want my tallow to be in the oven too long, just to get those few little last bits and bobs to render, because I don’t want the flavor of the tallow to increase significantly in strength. Tallow has a lovely flavor, but you can almost, I don’t know if override is a word, but if you let it go too long, it can take on a bit of a little too much of like a gamey or a beefy flavor. It has a lovely flavor that does have beef overtones, but it’s not a strong flavor. So what I would recommend is, to check your tallow as you’re going through the process, because the time will vary depending on how much fat you’re starting with, how much suet, or how much fat trimmings that have come off of muscle meat. It’s going to depend on how much you have. And so you’re going to want to check it at that hour and a half mark, see how it’s going, continue to, you know, check on the aroma, check on the color as you see nothing was ever burning. Nothing was ever sticking to the bottom of my pot. Everything was going beautifully at that 225-degree Fahrenheit mark.
Straining the Tallow
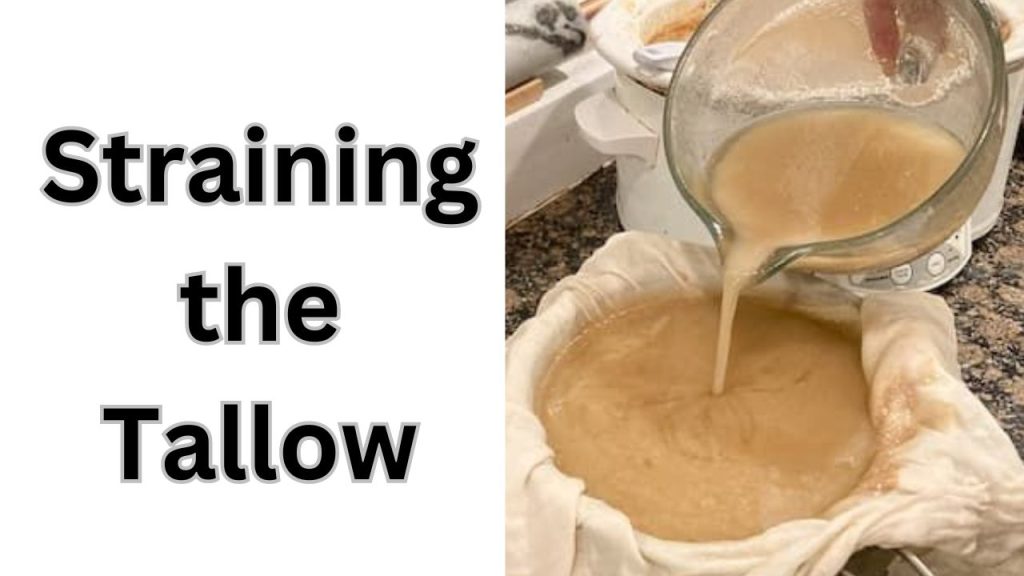
Now, what you’ll want to do is strain this through a fine mesh strainer into a heat-proof bowl. Now, to line or to not line your mesh strainer? I don’t worry about it and I don’t like it. Cleaning, a piece of a flour sack towel when you’ve strained this liquid tallow through it can be a little bit of a challenge. As well as getting, getting the tallow aroma out of your flour sack towel. So I do use it when I make bone broth, but the amount of beef fat that’s in bone broth is considerably, considerably less. So this is a lot of tallow you’re going to see when we start to strain this. So I find that just straining it through the mesh strainer works great. There aren’t a lot of little bits that can work their way through this.
Decanting the Tallow
Now, I’m going to show you the straining process, but I just want to show you what we’re working with here. You can see this, look at that liquid gold. This is beautiful. Now, what I have here is a heatproof bowl. I’ve got a fine mesh strainer. I put this down, fits perfectly, and I’m going to be able to strain my tallow into this. I have a ladle, and you may not need a ladle. You may be able to pour directly from your Dutch oven into your strainer. But given the fact that this is very heavy, I’m going to ladle it. Now I’m going to carefully ladle this through my strainer. Now don’t worry, when I get to the bottom, I’m going to be able to ladle this more quickly.
Storing the Tallow
I think I’m going to wind up ladling this and the reason is this is very heavy. If you had a smaller amount of suet, this would probably work great. But because I have such a large amount of suet that I started with, I think that ladling is going to be easier. So I’m going to ladle this through my strainer into my heatproof bowl. I don’t want to take any chances of spilling this.
Final Product
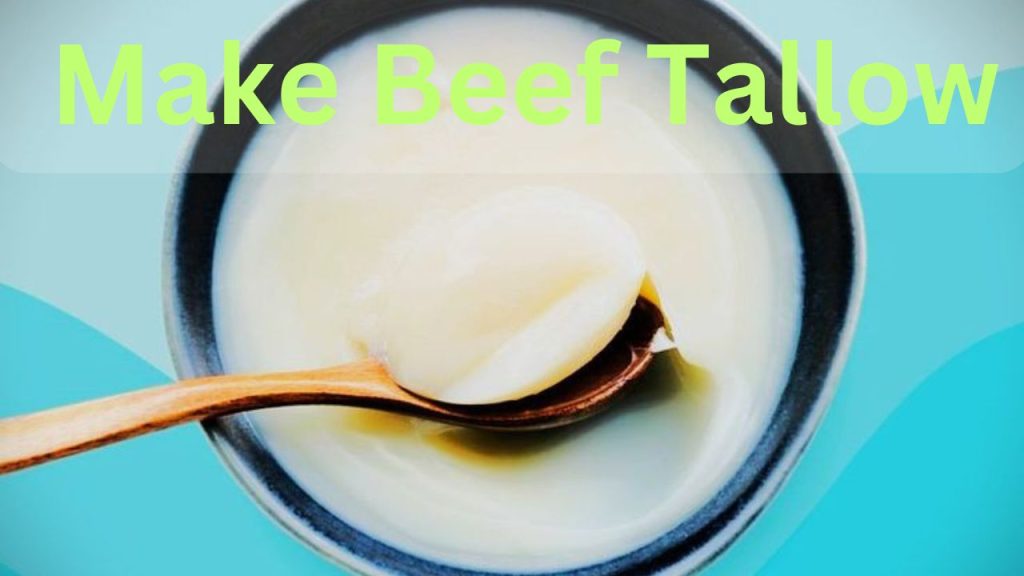
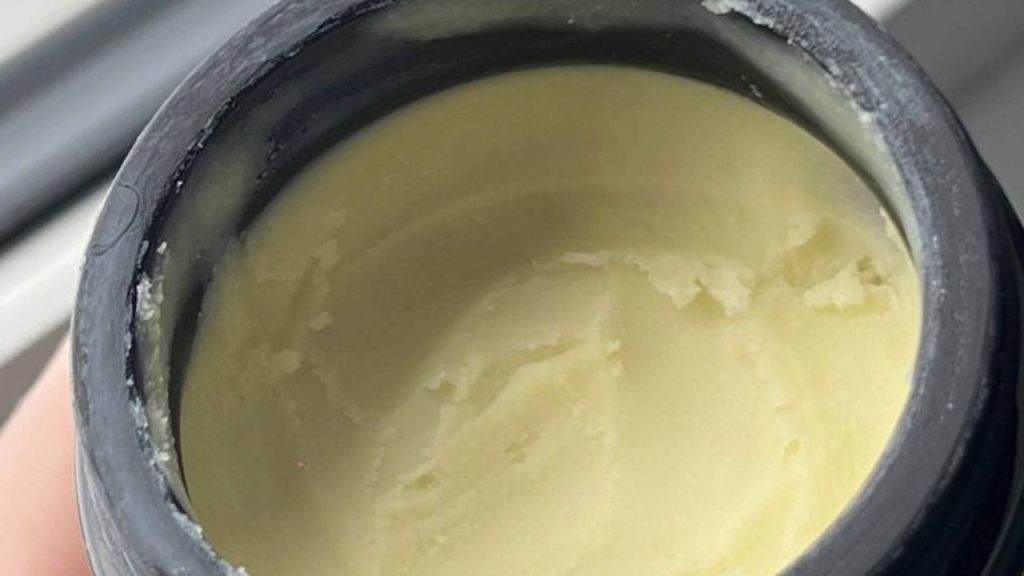
I want to show you this. This is just glorious. Look at that color. It is just a glorious yellow color and this is a sign of a very, very healthy cow, probably a pasture-raised cow. Just look at that and the aroma is wonderful. You know, tallow is very rich in Omega-3 fatty acids, like you find in salmon. So this is a very nutrient-rich fat.
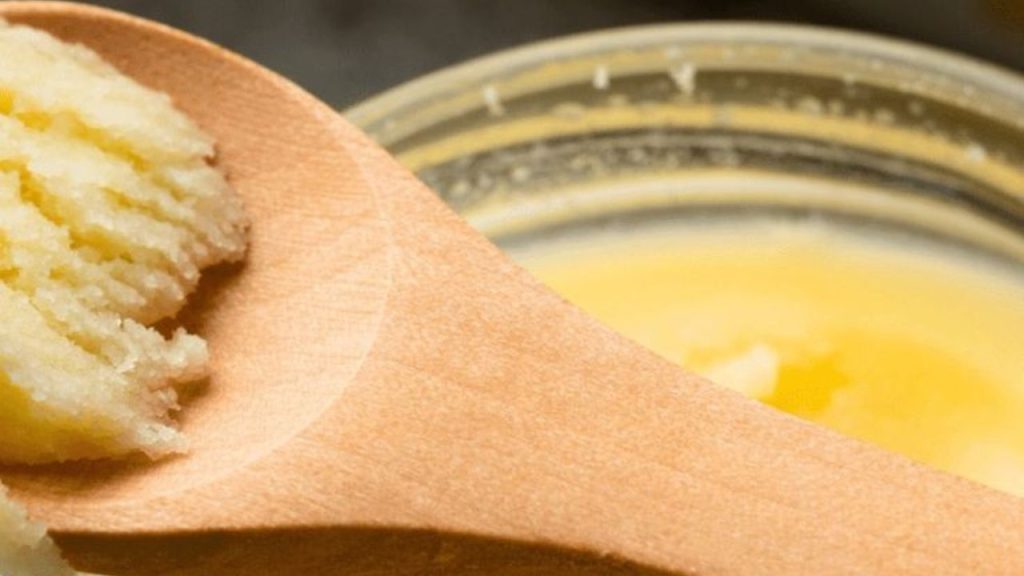
What to Do with Leftover Bits
Now, you may be saying, what do you do with all these bits that are left behind? Well, if you’re like me, you’ll put them back into your oven, spread them out, and you’ll let them crisp up a bit and you’ll make wonderful cracklings. Now, I just want to show you this. Look at this, that glorious yellow color. Look at that wonderful, glorious yellow color and the aroma is magnificent. This is a sign of a very healthy animal, a healthy cow. And most likely, I believe this is from a pasture-raised cow. So I’m very excited about this. Now, what I’m going to do is just go ahead and decant this into my quart-sized jar. And I think that this is going to fit perfectly into a quart-sized jar. And this is very hot, so you want to be careful when you’re decanting it. Well, what do you know? I had more tallow than I thought I would have, so I got two pint-sized jars as well as my quart-sized jar.
Using and Storing Tallow
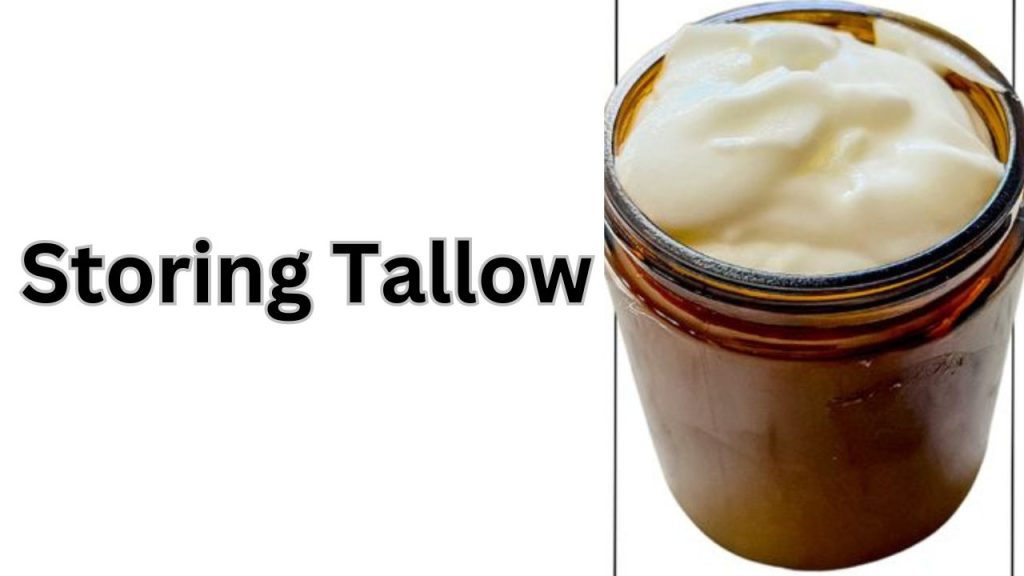
Now, this is what I’m going to do. I’m going to keep my quart-sized jar by my stovetop because this way I’ll always have it handy when I want to saute or pan fry or deep fry. And then I’m going to put these other pint-sized jars into my refrigerator or freezer and this will stay fresh. But in reality, tallow is very shelf-stable, so you can keep this on your counter.
Now, I’m going to let this cool just a little bit. I’m going to leave the lid ajar. I don’t want to put it on tight because it is warm and it’s going to be evaporating as it cools and that way the evaporation can escape. Now, you may have noticed that I left about an inch of head space in all of these jars, and I did that for a reason. I do that in case I want to go ahead and refrigerate or freeze this, so I don’t run any chance of it cracking.
So this way, as the tallow hardens, if it does expand a little, it has room for expansion and nothing will crack. And so now once this is completely cool, I’ll go ahead and tighten these lids and then just leave this one by my stovetop and I’ll put these two into the refrigerator or the freezer. And what you’ll notice when this hardens, it’s going to turn a nice creamy white. And I’m going to put these two jars over into my refrigerator and I’ll keep this one by my stovetop.
Conclusion
Making beef tallow at home is a rewarding process that enhances your cooking and provides a nutritious alternative to modern fats. By following the steps outlined, from selecting the right fat to rendering it slowly and carefully, you can create tallow that is not only rich in flavor but also beneficial for your health. Remember to store your tallow properly to maintain its quality and shelf life. Whether you’re using it for cooking, baking, or even crafting, beef tallow is a versatile and valuable addition to your kitchen. Embrace the traditional art of rendering tallow and enjoy the many benefits it brings to your culinary endeavors.